Friday, September 28, 2012

The Legendary Sauce


Here it is everyone. You've heard all about it. Finally, the day has come. My personal, homemade, Mrs. Solazzo’s inspired, Marinara Sauce. For years, I have been trying to replicate my mom’s sauce always never coming to par with her taste and quality. BUT the day has finally come… well it’s pretty close but still nothing will ever compare to her sauce. NEVERTHELESS, I think this might be the closest I could get without growing long brown hair, wearing heels, and sounding like I’m straight from Brooklyn.

My mom is the best cook I know. Now that I think about it, there has never been a time when I didn’t enjoy her cooking. Every time I come home, I know I’m gonna get a delicious homemade meal. And I can’t explain it but it always makes me feel 10 times better. It could be that I’m just home with my family, or it could be the drugs she crushes on top of the pasta (just kidding… I hope), either way something reminds me that I’ll be ok. It must be the mama’s touch. The other day, I was walking home with my friends and I heard my friend’s heels clack on the ground and I instantly felt relaxed and settled. I told my friend later that my mom always wears heels and it reminded me of home. Although it was an extremely awkward moment when she thought I considered her motherly, it made me realize how much I miss my family. OK! I’m a momma’s boy. I admit it. Anyway, I knew it was time to make something in her honor. And here it is; my mom’s inspired homemade sauce. I hope you enjoy this sauce and feel the same warmth in your heart as I did.  

The sauce is relatively easy to make. I would like to share some helpful hints before I give you the recipe. Sauce reminds me of wine a bit. The longer it sits (on the stove), the better it gets. The best sauce I ever had was when my mom made sauce when she woke up and let it sit on the stove (on low heat) all day. Even my friend Annie Betz, whom I have been friends with since we met freshman year at orientation, agrees with me when we made it the other day. We were so anxious to taste the sauce that we had a spoonful every 15 minutes. And BY GOLLY, I was right. The sauce got better and better as it sat on the stove. However, if you’re in a rush, sauce can take as little as 20-30 minutes to make. Another helpful hint I would like to add is… when I make sauce I always throw some sort of meat in there, such as sausage or meatballs. The meat adds a lot of flavor to a sauce and gives it a little more body to it. And on the plus side, the sausage or meatballs soaks up all of that sauce and tastes even more delicious.

Thank you all for reading our blog, Shut Up and Eat. We really appreciate all of the comments and likes on facebook. Please feel free to comment below to tell us what you think or follow us on Twitter for updates. You can also submit your e-mail on the side bar to receive e-mails every time we post! Now, Shut Up and Eat.

Bon Appetite,
Dom

The Legendary Sauce:

Click here for the PRINTABLE VERSION!

Ingredients:
2 cans of Crushed Tomatoes
4 sweet (or hot) sausage links
½ medium sized red onion, chopped
4 cloves of garlic, minced
3 Tbls. Extra Virgin Olive Oil
1 Tbls. Fresh (or dried) Basil, chopped
Spices: Garlic powder, Emril’s Original Essence Seasoning, Crushed Red Pepper, Oregano, Italian Herb Seasoning. Add about 2 tsp. of each to sauce, to taste.
Salt & Pepper, to taste


Description:
To start, you have to cook the sausage a little bit so the raw meat doesn’t mix with your sauce. In a medium-large sauce pan, heat up the olive oil on medium heat. Throw the sausage on when the pan starts to get hot and wait for it to brown on all sides, flipping them over occasionally for a couple of minutes.


After that has cooked, throw in the red onion and garlic and 
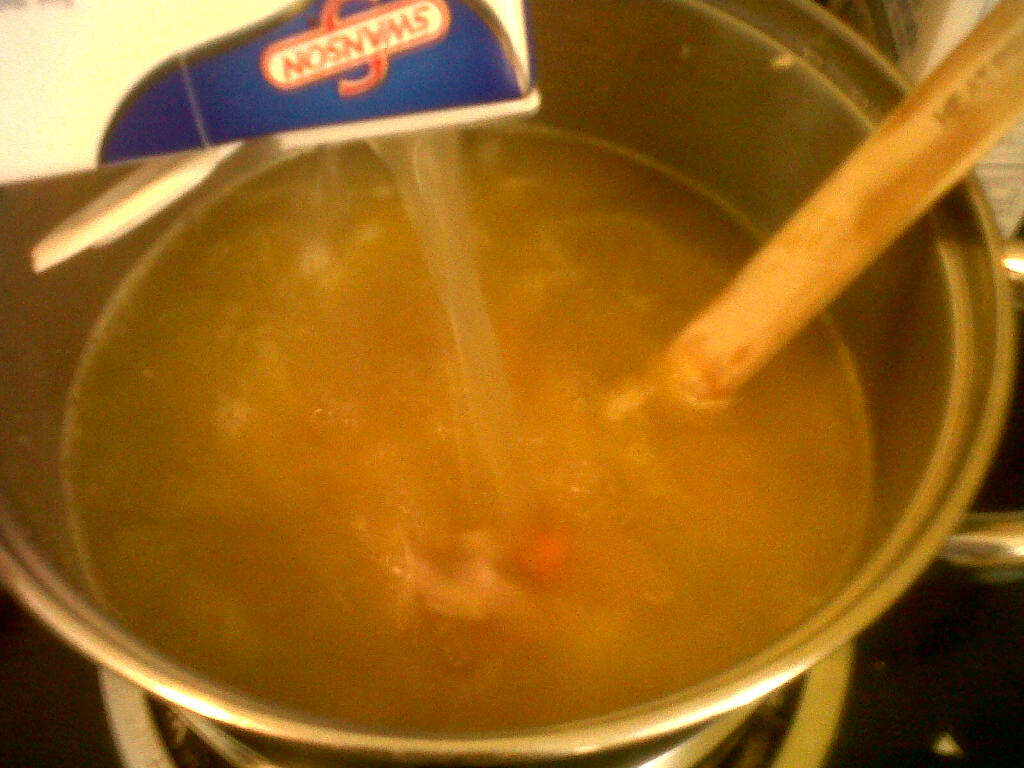
let them brown as well (2-3 minutes). Once everything is browned, open the 2 cans of crushed tomatoes and pour slowly into the pot… At this point I would put on an apron because sauce is notorious for spilling everywhere.


Stir the crushed tomatoes in with the sausage, onions, and garlic and change to low heat. After that, it’s time to spice it up, Emril Style. BAM! Place all of your spices into the pot including the chopped basil. Remember that not all of these spices are necessary and can be changed with spices that are more desirable to your palate.


Stir in all of your herbs and let the sauce rest on the stove for at least 20 minutes, uncovered. Like I said, you can leave the sauce on the stove all day if you wanted to… checking and stirring it occasionally to make sure it doesn’t burn on the bottom. My mom uses this stove plate that she places under the pot that keeps the sauce from burning… I have to get one of those. 


Anyways, let the sauce cook for as long as you want and place it on every kind of meal you can think of. I use it for pasta (of course), mix in with veggies and rice... (Quinoa and Roasted Veggies Recipe), chicken parm, anything your heart desires. And if you can't think of anything to use it with simply put it in some tupperware and place it in the freezer. It's always good to have some extra sauce ready to eat... except when its jarred and from a store. Then no, it's not good. I hope you all enjoy my legendary sauce! 

Now, Shut Up and Eat. 


Sunday, September 23, 2012

Oh My, Pumpkin Pie!

It's Fall. Only the best time of the year. The weather is perfect. The leaves are gold, red, and brown. Starbucks is finally bringing back the Pumpkin Spice Latte, which I have recently taken full advantage of. For the women, Riding boots are becoming acceptable to wear again. For men, legging season is back, be happy. And everyone just seems to be in a better mood :) Why not add a homemade clean pumpkin pie to the mix? 

I got the urge to make said pumpkin pie the moment my pumpkin spice grande latte was called by the Starbucks lady. That first taste of pumpkin, spice and everything nice is, in my opinion, like a liquid hug. Perfection. I knew right then and there I had to make a pumpkin pie. I would be dishonoring the best season if I didn't! So in true Laura fashion, I woke up way too early on a Sunday morning, had my breakfast and decided the next logical thing to do was to make a pumpkin pie. 

Best Sunday morning ever. 

My whole apartment smells like nutmeg, cinnamon and pumpkin right now. I am proud to say I did not use an ounce of sugar anywhere in this recipe. But the pie still tastes amazing! For those of you concerned about calories, 1/8 of this pie comes to about 192 calories. Not too shabby for a scrumptious pumpkin pie! And com'on! Who doesn't love pumpkin pie?!? I had several friends tell me this week that I had to save them a piece because it's just that good. So if you have a Sunday coming up where you feel like doing a little baking before you're friends or family wake up, MAKE THIS PIE.
Enjoy.

Ingredients:

Crust
1 1/2 cups whole-wheat pastry flour, plus additional for work surface
1 tsp Truvia (Or any sweetener of choice)
1/4 tsp sea salt
1/2 tsp baking powder
1/3 cup Almond milk, or low-fat milk
1 egg yolk
1 tbsp sunflower oil
1 tbsp apple cider vinegar


Pumpkin Pie Filling 
2 cups prepared pumpkin
1/2 cup agave or honey
4 egg whites
1 1/2 tsp. cinnamon
1/2 tsp. ground ginger
1/4 tsp. ground cloves
1 1/2 cups fat-free milk (you can substitute unsweetened soy, almond or rice milk)


Prepare the Crust

Preheat oven to 375°F. In a large bowl, combine flour, Truvia, salt and baking powder. 
Mix thoroughly. 


In a measuring cup, whisk together milk, egg yolk, oil and vinegar. Whisk just enough to combine ingredients. 


Slowly pour liquid into dry ingredients. The mixture will be partially crumbly, but will stick together when squeezed.


Pour dough out onto a well-floured surface. Squeeze dough together into a mound and pat it down into a disc, about 1/2-inch thick. Using a rolling pin, roll dough out until 12 inches in diameter. Set rolling pin at bottom edge of dough and gently roll dough onto pin, so that dough drapes over pin. Transfer dough to pie dish. Gently press dough into the edges of the dish and up the sides. Fold excess dough under and pinch, creating a roughly 1/2-inch rim. Using your fingers, or with the tines of a fork, crimp entire rim. Poke dough all over with a fork to create steam holes.


Bake Crust for 20 minutes. Take out and let cool completely before pouring filling in.


Prepare the Pie Filling

Preheat own to 425 degrees. Combine all ingredients into a large mixing bowl.


Crust should be completely cook by now.


Pop in the over on 425 degrees for 15 minutes. Then decrease temperature to 350 degrees for 45 minutes.


Remove from the oven and let cool completely. Cut into eighths and enjoy!


Now, Shut Up and Eat.

Love,
Laura


Wednesday, September 19, 2012

Spicy Chicken Stir Fry


Whenever I’m in the mood for some Asian cuisine, this is the first dish that pops into my head. Spicy Chicken Stir Fry is one of my favorite dishes to make because it’s not only relatively quick to make, but is also nutritious with the abundance of delicious veggies, lean protein and those quintessential carbs! This dish is also very versatile because you can opt-in/out any veggies your heart desires. Let your imagination run wild with this dish because any kind of veggie can be thrown into this dish and can still taste delicious. The secret ingredient (Spicy Stir Fry Sauce) really ties everything together and allows the dish to have as little seasoning as possible… meaning less work for me (thank GAWD!). You put some salt, some peppa, and drizzle this bad boy on there and you got yourself a tasty meal that tastes like it came directly out of PF Changs Kitchen!... Look at that huh? Simple as that. Of course there are a few crucial steps in-between to get you from the stove to the table. Nonetheless, this meal will satisfy your Asian fix any day.

I was grateful enough to share this meal with a couple of my good friends. Jenn, co-founder of Shut Up and Eat, graced everyone with her presence along with my roommate Eric Kindler, and my new friend Deirdre McDermott. OH! Did I mention this is a great meal to make in bulk? This is a meal that will fill you up so you can always have leftovers… unless your roommate is Eric and is a living garbage disposal. Nonetheless, it is a great meal to share with friends and family and I would strongly encourage the company because that’s really what it’s all about, sharing moments with the people you love. Those are the memories you will remember as you live your life, not that bad grade on some test in Finance… sorry mom. Focus on the things that truly make you happy. Alright enough of the life lessons talk, back to the food blog.

Jenn actually introduced me to this dish last year and I’ve been addicted to it ever since! Actually, every time she has come over for dinner this year I think I have made this dish for her 4 out of the 5 times. She must regret the day she told me this recipe. Sarry Jenn. Once again, this dish is very versatile, not only with the endless amount of veggies you can add but you can substitute the brown rice for jasmine rice, white rice, any rice you desire. I like the brown rice because it is the best for you (with all of the fiber) and I think it tastes better than plain white rice. You also do not need to have a rice cooker readily available, you can always use a medium sauce pan. All you really need is love, friends, and that Spicy Stir Fry Sauce. You can find that at any local supermarket in the international or seasoning aisle. They also have a classic (mild) stir fry sauce if you don’t sit well with spiciness.

I hope you all enjoy this dish and thank you all for reading. Laura, Jenn and I really appreciate the great feedback we have been recieving and would love to hear more from you. Please comment below or stay updated with our facebook posts and tweets along with submitting your e-mail above to receive an e-mail every time we post something new! Thanks again guys and don’t forget to Shut Up and Eat.

Bon Appetite,
Dom

Spicy Chicken Stir Fry

Click Here for the PRINTABLE VERSION!

Ingredients: (Serves 4)
2 Chicken Breasts, cubed
2 cups of Brown Rice
4-5 cups of water
2 Red Bell Peppers, sliced 
1-2 Broccoli Crowns, sliced
10-12 (Handful) of Baby Carrots, chopped
1 Small Red Onion, minced
10-12 (Handful) of Cherry Tomatoes, sliced into quarters
4-5 Portabello Mushrooms, cubed
4 cloves of garlic, minced
3 Tbls. Extra Virgin Olive Oil
4 Tbls. (or eyeball it) Spicy Stir Fry Sauce
Salt & Pepper, for taste


Directions:
First start with getting the rice started. If you have a rice cooker, place the brown rice and water into the pot and turn on with lid. If you do not have a rice cooker, simply place the brown rice and water into a medium sauce pan on medium heat and bring to a boil. Once it is boiling, cover for 20-25 minutes and set heat to low. (Left picture: before, right picture: after) While that’s on its way, you can start preparing the veggies. 


Of course wash all of your veggies (and your hands) before you get started with preparing them. Try to cut the veggies relatively the same size so they can cook at the same pace. On the side, before you place the veggies on the stove, you must season and cube your chicken. Since we are dealing with raw meat, I would recommend cooking the chicken in a small skillet before transferring it into the same skillet as the veggies.


After you season and cube the chicken, heat up 2 tbls. of olive oil on medium heat into a small skillet and throw the chicken on top. Note: you just want to cook the chicken enough so the outside is cooked (white) because the chicken will continue to cook once you transfer them over to your veggies.


In a large skillet, heat up 2-3 tbls. (I always eyeball it) of olive oil on medium heat and place your garlic and red onion in there first. Allow them to brown a little then throw in the rest of the veggies. Season everything with salt and pepper and stir frequently to get the olive oil to coat all the veggies.


Once your chicken is cooked (white) on the outside, drizzle (1-2 tbls.) of Spicy Stir Fry Sauce into the pan and stir. Apply the same amount, if not more to the veggies. Once fully coated and 2-3 minutes have passed, transfer the chicken over to the veggies. Mix the chicken in with the veggies and you will see that you are almost ready to eat. If you think there needs to be more stir fry sauce, apply as much as you desire. This entire process takes about 20-25 minutes, just in time for the rice to be finished.


To add a little bit of fun and presentation skills into this meal you can shape the rice into any shape on the plate. I did hearts for girls because I’m lame… I mean a ladies man. Use your creative skills and create a fun shape to surprise your dinner guests! Place some veggies overtop of the rice and you’re ready to eat! If you are of age, have a glass of wine with dinner. Wine can be very beneficial to the heart and soul. Drink responsibly. Enjoy everyone!


Thursday, September 13, 2012

Homemade Chicken Noodle Awesome


Welcome to Fall everyone! It is 100% my favorite season. The leaves crunching under your feet, pumpkins, apple picking, comfy sweaters and most importantly the D-E-L-I-C-I-O-U-S food. Generally, when the weather gets a little chillier, I get in the mood for a nice hot bowl of Chicken Noodle Soup. This has to be one of my favorite dishes that my Mom makes. She would always make it for me when I came home from college on break and wanted some home cooking. You could always tell when she was cooking this delectable soup because the house smelled like sautéed onions, garlic, carrots and celery. So comforting. The smell that meant home. My Mother cooks everything she makes from scratch and it's a favorite activity of mine to watch her make food come to life. Even when I was little I'd always be jumping up next to the counter just to get a peek at what she was making. 


This is my beautiful Mother and her newest child, my dog, Mackenzie. Her "everything from scratch" cooking has been my constant inspiration and origin of my passion for food. She taught me how to cook, shop for the ripest and freshest food and how to add a dash of love to everything I make.  No matter how loyal I am to my Mom's recipes my food always seems to taste not as good as hers. Just something about Momma's cooking I guess! Chicken Noodle Soup is one of those dishes she taught me how to make so that when I'm away at college I can whip this up and freeze it for later. It's cheap, easy and, most importantly, good for you! It's loaded with veggies and roasted chicken. There's no lack in nutrition here! Always a good thing in my mind :) 

So now it's senior year and I have no clue what this year is going to bring. It's a little scary and mostly stressful. So when I start feeling like this I like to make myself feel at home. What could be a better remedy than filling my apartment with the smell of Chicken noodle? I guarantee it will put a permanent smile on your face. I hope when you try out this recipe it keeps you warm in the coming cold months and it gives you a little feeling of home. 

Ingredients:
2 tbls extra virgin olive oil
2 garlic cloves, minced
3/4 large vidalia onion, diced
2 cups celery, chopped
2 cups carrots, peeled and chopped
1 cooked rotisserie chicken
2-3 Boxes of Swanson Reduced Sodium chicken broth
3 handfuls egg noodles (I used whole wheat noodles for a little more nutritional value)
Sea Salt, to taste
Black Pepper, to taste


First, mince garlic.


Dice the onion, make sure the onion is all relatively the same size. This way it will cook evenly.


Heat up tall pot. When pot is hot add olive oil, garlic and onion. Season with salt and pepper. Stir.


Dice and add celery to pot. Stir.


Dice Carrots. Again, make sure the pieces are all relatively the same size and thickness.


Add carrots to pot. Season again and stir.


Next, shred rotisserie chicken. Make pieces chunky as you like.


Add chicken to pot.


Add broth to pot and stir. Let simmer.


In the meantime, boil water and add noodles. Cook aldente (slightly firm). 


When aldente, add pasta to soup. Salt and pepper to taste.


Let simmer for 5 more minutes and wah la! You have an amazing smelling apartment and a hot meal!


Now, Shut Up and Eat.